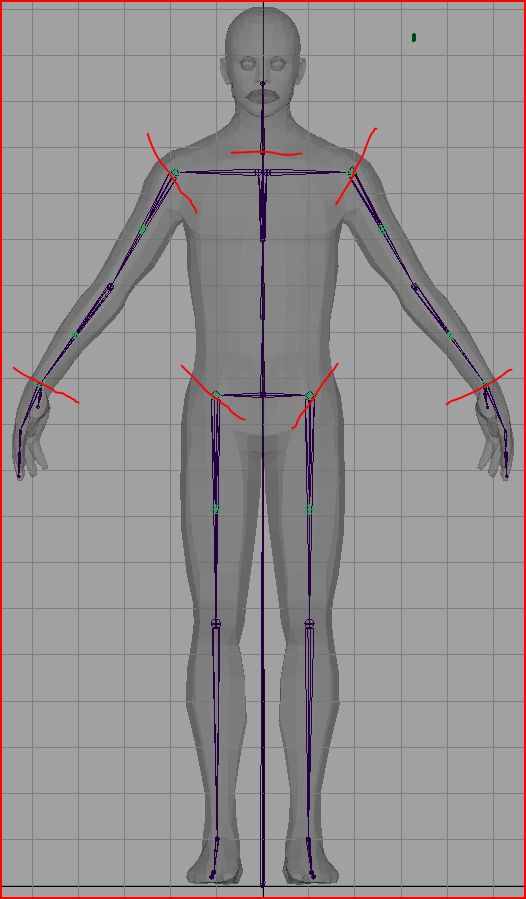
Using a standard biped character as an example, you'd generally expect it to consist of the following distinct parts:
- Spine (including shoulder joints)
- Neck/head
- Arms
- Wrist/fingers
- Legs
Just to recap on an earlier post, a broken hierarchy structure is not suitable for export to a game engine. As such, the broken hierarchy control/driver rig drives a non-broken skeletal hierarchy using point and orient constraints. It is this unbroken skeleton that the mesh is skinned to and from which animation data is sampled from at export
One key feature that you can implement is space switching which provides different behavior types for a limb. A set of spaces for an fk arm or arm ik controller might include (note that fk arm is always point constrained to end of shoulder joint so won't 'break off'):
- World space - no matter what the character does, arm will remain constant relative to the world.
- COG (center of gravity control) space - if torso or shoulder are rotated arm will remain static. If COG is rotated arm will follow.
- Hips - if COG or hips are rotated, arm will follow. If torso or shoulder are rotated then arm will remain static.
- Torso space - if COG, hips or torso are rotated, arm will follow. If shoulder is rotated the arm will remain static.
- Shoulder space - if COG, hips, torso or shoulder are rotated then the arm will follow.
Essentially what you are doing is changing the coordinate system that the arm exists in by switching inputs to the orientation constraint at the top of the fk arm or the parent constraint on the group of the ik arm control. Creating a space system is only possible with a broken hierarchy rig, and provides animators with a range of behaviours to enable them to produce work quickly and efficiently. Now, if the default behaviour of an arm or ik control isn't what you need you can change it. Want to shrug the shoulders without having to counter-animate the arms? Great! Want to pin the arm to the hips but it not float off when you rotate the torso? Yep, we can do that too!
Building a space switch for left FK arm
I'm starting with a joint chain from shoulder to wrist duplicated from the bind/export skeleton. They have the prefix 'driver_' as these joints would form part of the driver rig that drives the bind skeleton via point and orient constraints. For the sake of simplicity I'll create spaces based on joints in the export skeleton, normally they'd be hooked into rig systems that don't exist in this demo scene.

Duplicate driver_l_arm. Delete all children of the new arm joint and rename it end_driver_l_shoulder. Parent driver_l_arm to the scene root, duplicate it a second time and once again delete the children of the new joint and rename it driver_l_arm_ori. Parent driver_l_arm to driver_l_arm_ori.

Point constraint driver_l_arm_ori to end_driver_l_shoulder.
Create a group called space. Create three more groups called COG_space, sternum_space, and l_shoulder_space. Parent constrain COG_space to COG joint, sternum_space to sternum joint and l_shoulder_space to l_shoulder joint.

Create an empty group called COG_space_driver_l_arm_ori and snap its position and orientation to driver_l_arm. You can do this by creating and deleting a parent constraint, or by using the custom parent snap functionality.
Make sure the rotation order of this group matches that of driver_l_arm, which in this case is zyx.

Duplicate COG_space_driver_l_arm_ori twice more and name them sternum_space_driver_l_arm_ori and l_shoulder_space_driver_l_arm_ori. Parent each group to their equivalent space groups.


Add an Enum attribute called space to driver_l_arm with Enum names COG, sternum and shoulder.

Import driver_l_arm and driver_l_arm_ori_orientConstraint1 into the hypershade. Create three condition nodes called driver_l_arm_ori_COG_space_cond, driver_l_arm_ori_sternum_space_cond and driver_l_arm_ori_shoulder_space_cond. For each, set colorIfTrueR to 1 and colorIfFalseR to 0.
Set driver_l_arm_ori_sternum_space_cond.secondTerm to 1 and driver_l_arm_ori_shoulder_space_cond.secondTerm to 2.

Using your preferred method of connecting attributes, connect driver_l_arm.space to the firstTerm attribute of the three condition nodes.
Connect driver_l_arm_ori_COG_space_cond.outColorR to driver_l_arm_ori_orientConstraint1.COG_space_driver_l_arm_oriW0
Connect driver_l_arm_ori_sternum_space_cond.outColorR to driver_l_arm_ori_orientConstraint1.sternum_space_driver_l_arm_oriW1
Connect driver_l_arm_ori_shoulder_space_cond.outColorR to
driver_l_arm_ori_orientConstraint1.shoulder_space_driver_l_arm_oriW2

With everything connected you should see the orient constraint weights changing as you change the space attribute on driver_l_arm.

A couple of last bits to do... Parent constrain with offset driver_l_shoulder to sternum. Point and orient constrain with no offset the left arm joints (shoulder, arm, elbow and wrist) of the export skeleton to your driver joints.
And here is a capture of this working.
Thanks for this article ^__^
ReplyDeletevery informative !
Dear Matt,
ReplyDeleteI'm trying a similar setup. The problem is that i get cycles. Is this normal?
Whenever I move a controller, others connected controllers to it lag a bit behind.
Hi Esther, no this isn't normal. Cycle checks are always bad, essentially it's a like the feedback you get from holding a microphone up to a speaker; the sound from the speaker is picked up by the microphone, which comes out through the speaker, which is picked up by the microphone etc. etc. etc.
ReplyDeleteThis is basically what a cycle check error is - there is a mistake in your set-up somewhere. E.g, nodeA influences the position of nodeB which influences the position of nodeA, which adds more influence to the position of B, which adds to A etc. etc. etc. and the whole thing explodes, or lags, or just does weird stuff.
You'll need to pick through the graph in the shading editor, follow the direction of data flow through the network and find where it loops back to an earlier point (this can take a while).
Thanks Matt!! :)
ReplyDeleteNice blog very informative. For more information visit shoulder rig
ReplyDelete